How to Make a Digital Menu Board: Three Routes, Start to Screen
How to make a digital menu board three ways — a free browser maker with no sign-up, an AI draft read from a photo or PDF of your current menu, or from scratch in the editor — then pair the TV in about two minutes.
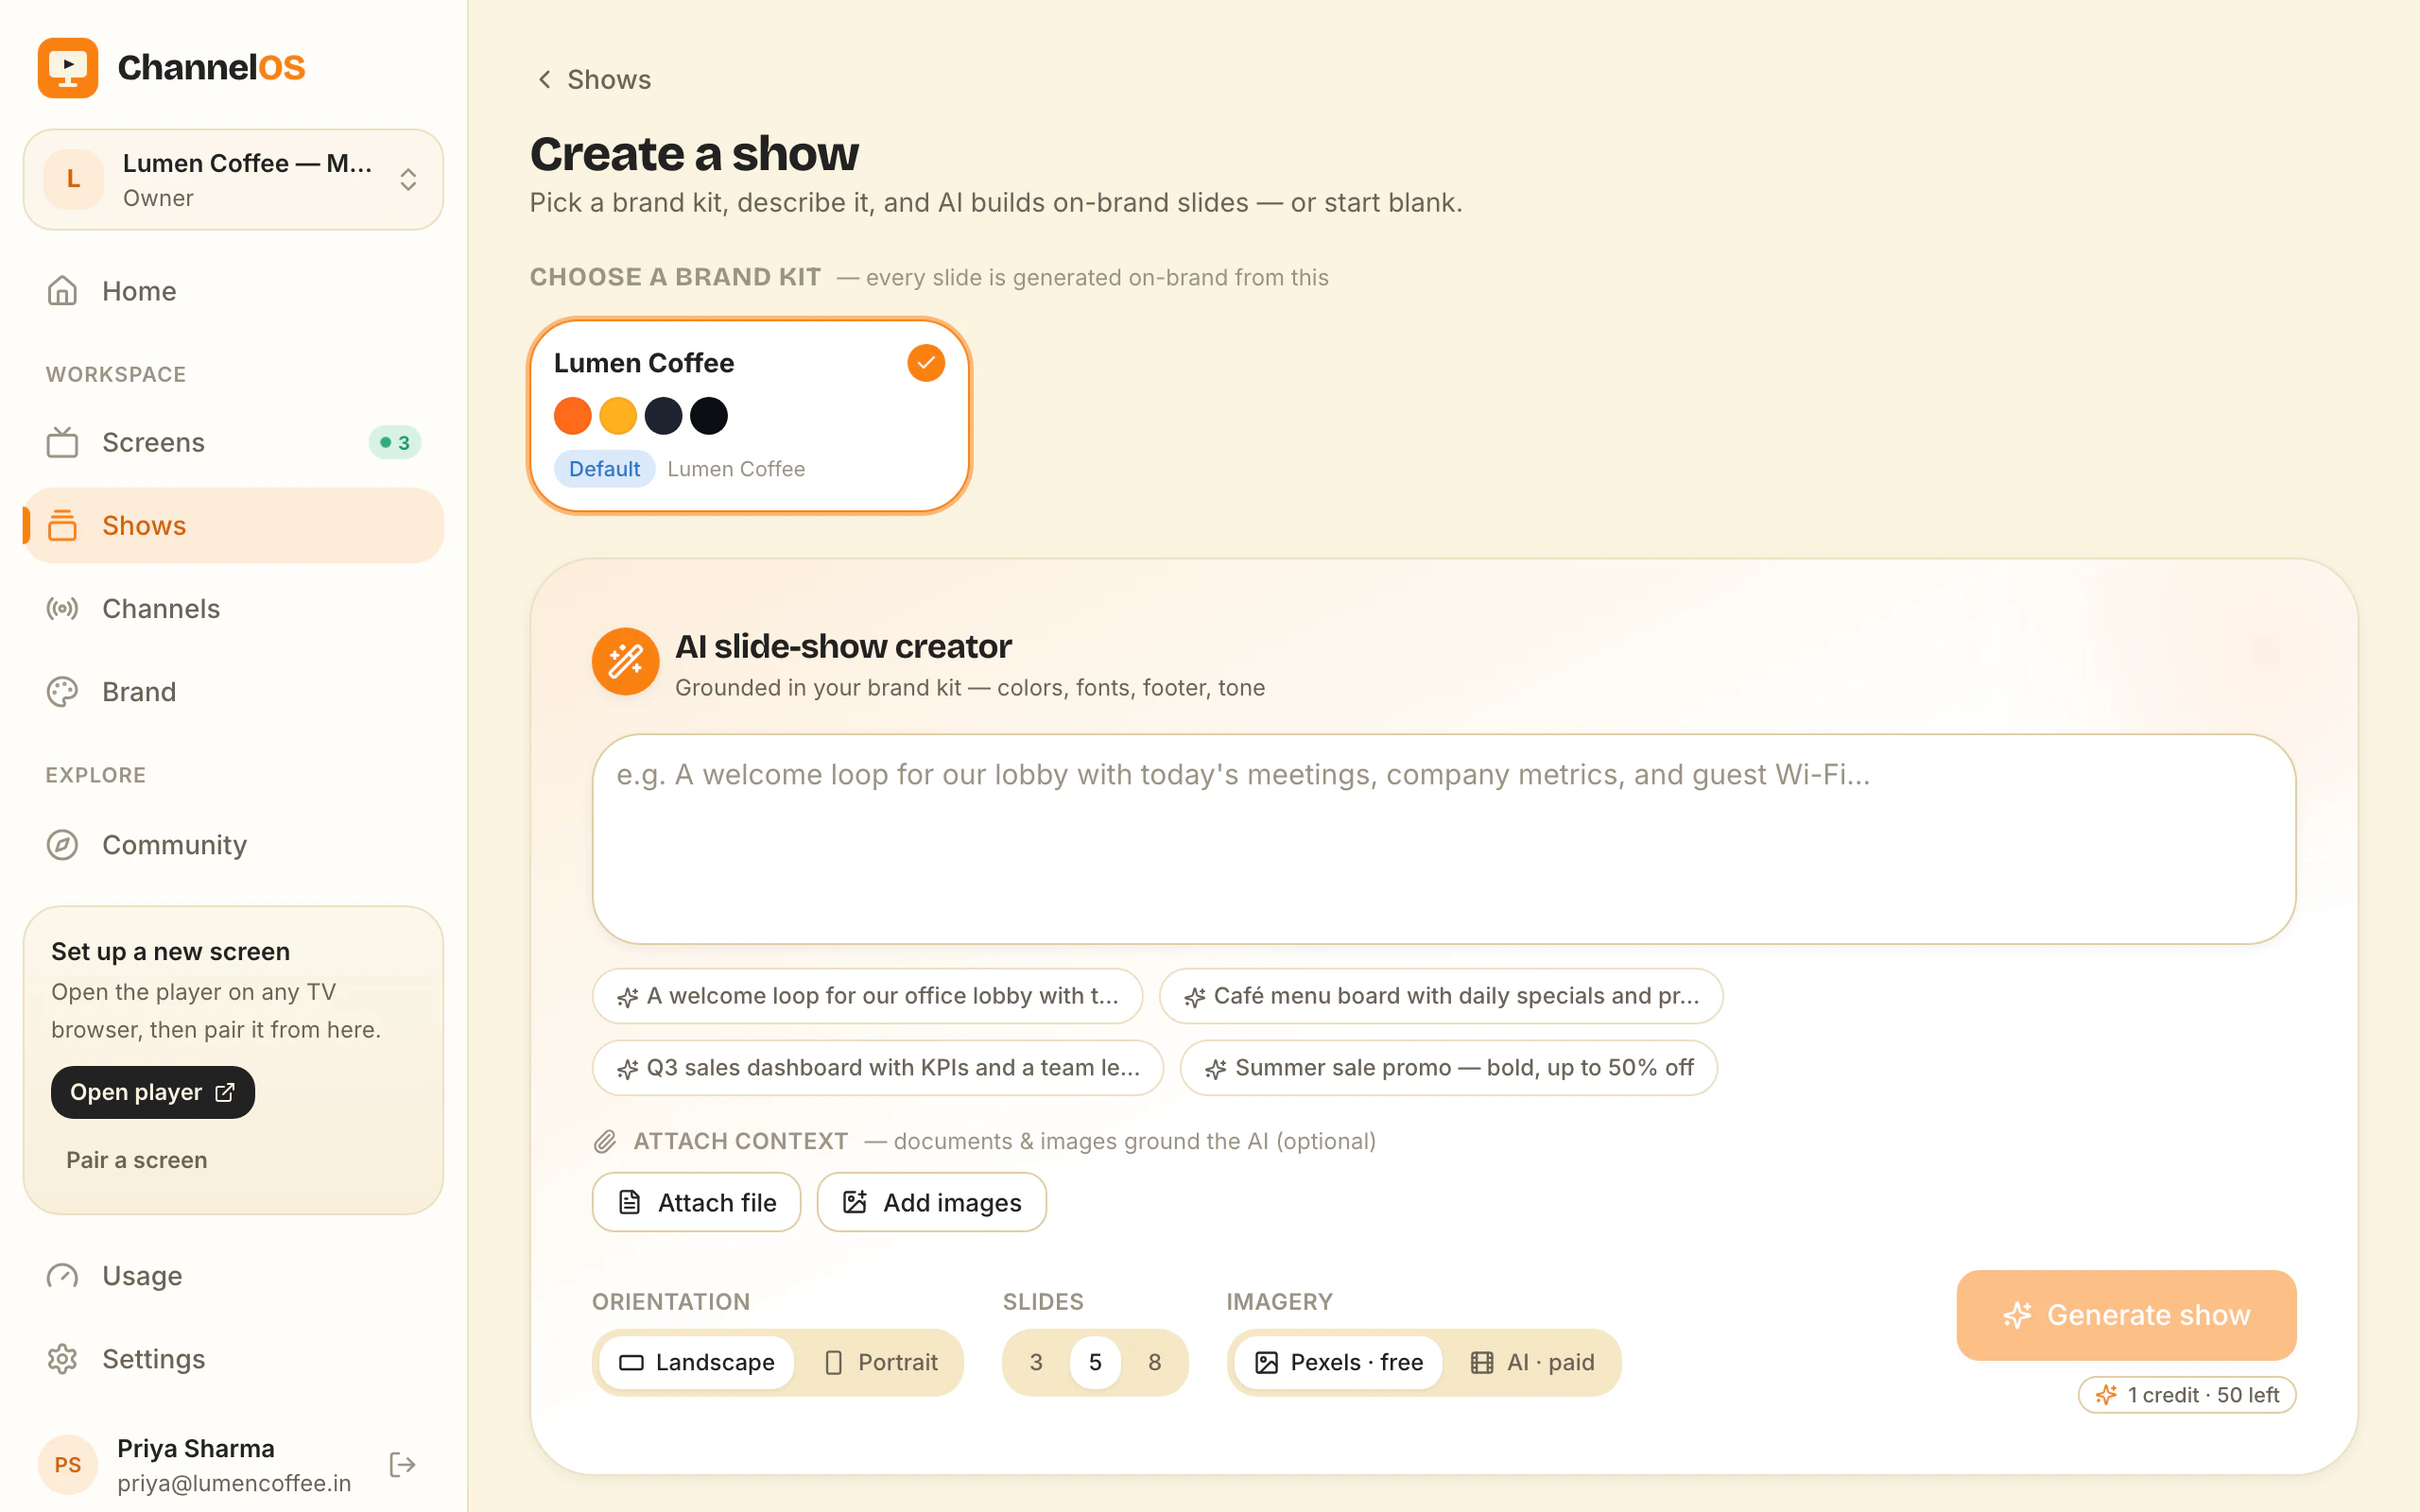
If you are working out how to make a digital menu board, the honest answer is that there are three routes to the first draft, and they are not equally fast. One takes a few minutes in a browser tab and needs no account. One takes a photo or a PDF of the menu you already print and lets AI do the layout. One is you and a blank canvas. All three end in the same place: a board on a TV, changed from your phone.
This walks through each route, then the part everyone skips — getting it onto the actual screen.
Before you start: what you actually need
Less than most guides claim. A TV with a web browser (Android TV, Google TV, webOS, Fire TV, a Chromebox, or a laptop in kiosk mode), a working internet connection, and your menu in some form — a PDF, a photo of the printed one, or just the items in your head.
You do not need a media player box, a designer, or a per-device licence. The TV’s own browser is the player, which is the whole argument in no media player required.
Two decisions worth making before you build anything:
- Aspect. 16:9 landscape at 1920×1080 for a wall-mounted TV. If the screen is mounted portrait, design portrait — rotating a landscape board crops the photos and squeezes the type.
- How many boards. One screen showing everything is worse than three boards that rotate. Drinks, food, specials. Splitting them is what lets you daypart later.
Route 1: the free menu board maker, no sign-up
The fastest route, and the one to take if you want something on a screen this afternoon.
Open the free menu board maker. Pick your cuisine — there are 14 facets: pizzeria, sushi, burgers, bbq, chinese, thai, italian, mexican, cafe, bakery, bar-pub, indian, food-truck and dessert. Type your sections, items and prices into the form. The board renders as you type, so you are correcting a real board rather than imagining one. Download the 1920×1080 PNG.
No account, no email, no card. The file is yours.
What you get: a finished image at TV resolution, immediately.
What you give up: it is an image. When the price of a flat white changes, you go back to the maker, retype it and re-download. Nothing on the screen updates itself, because there is nothing behind the picture to update.
Why it matters: an image board is a perfectly good first day. It is a poor first year.
Route 2: AI builds it from a photo or PDF of your current menu
You already have a menu. It exists as a PDF from the printer, or as a laminated card you can photograph. Retyping it into a design tool is the step worth deleting.
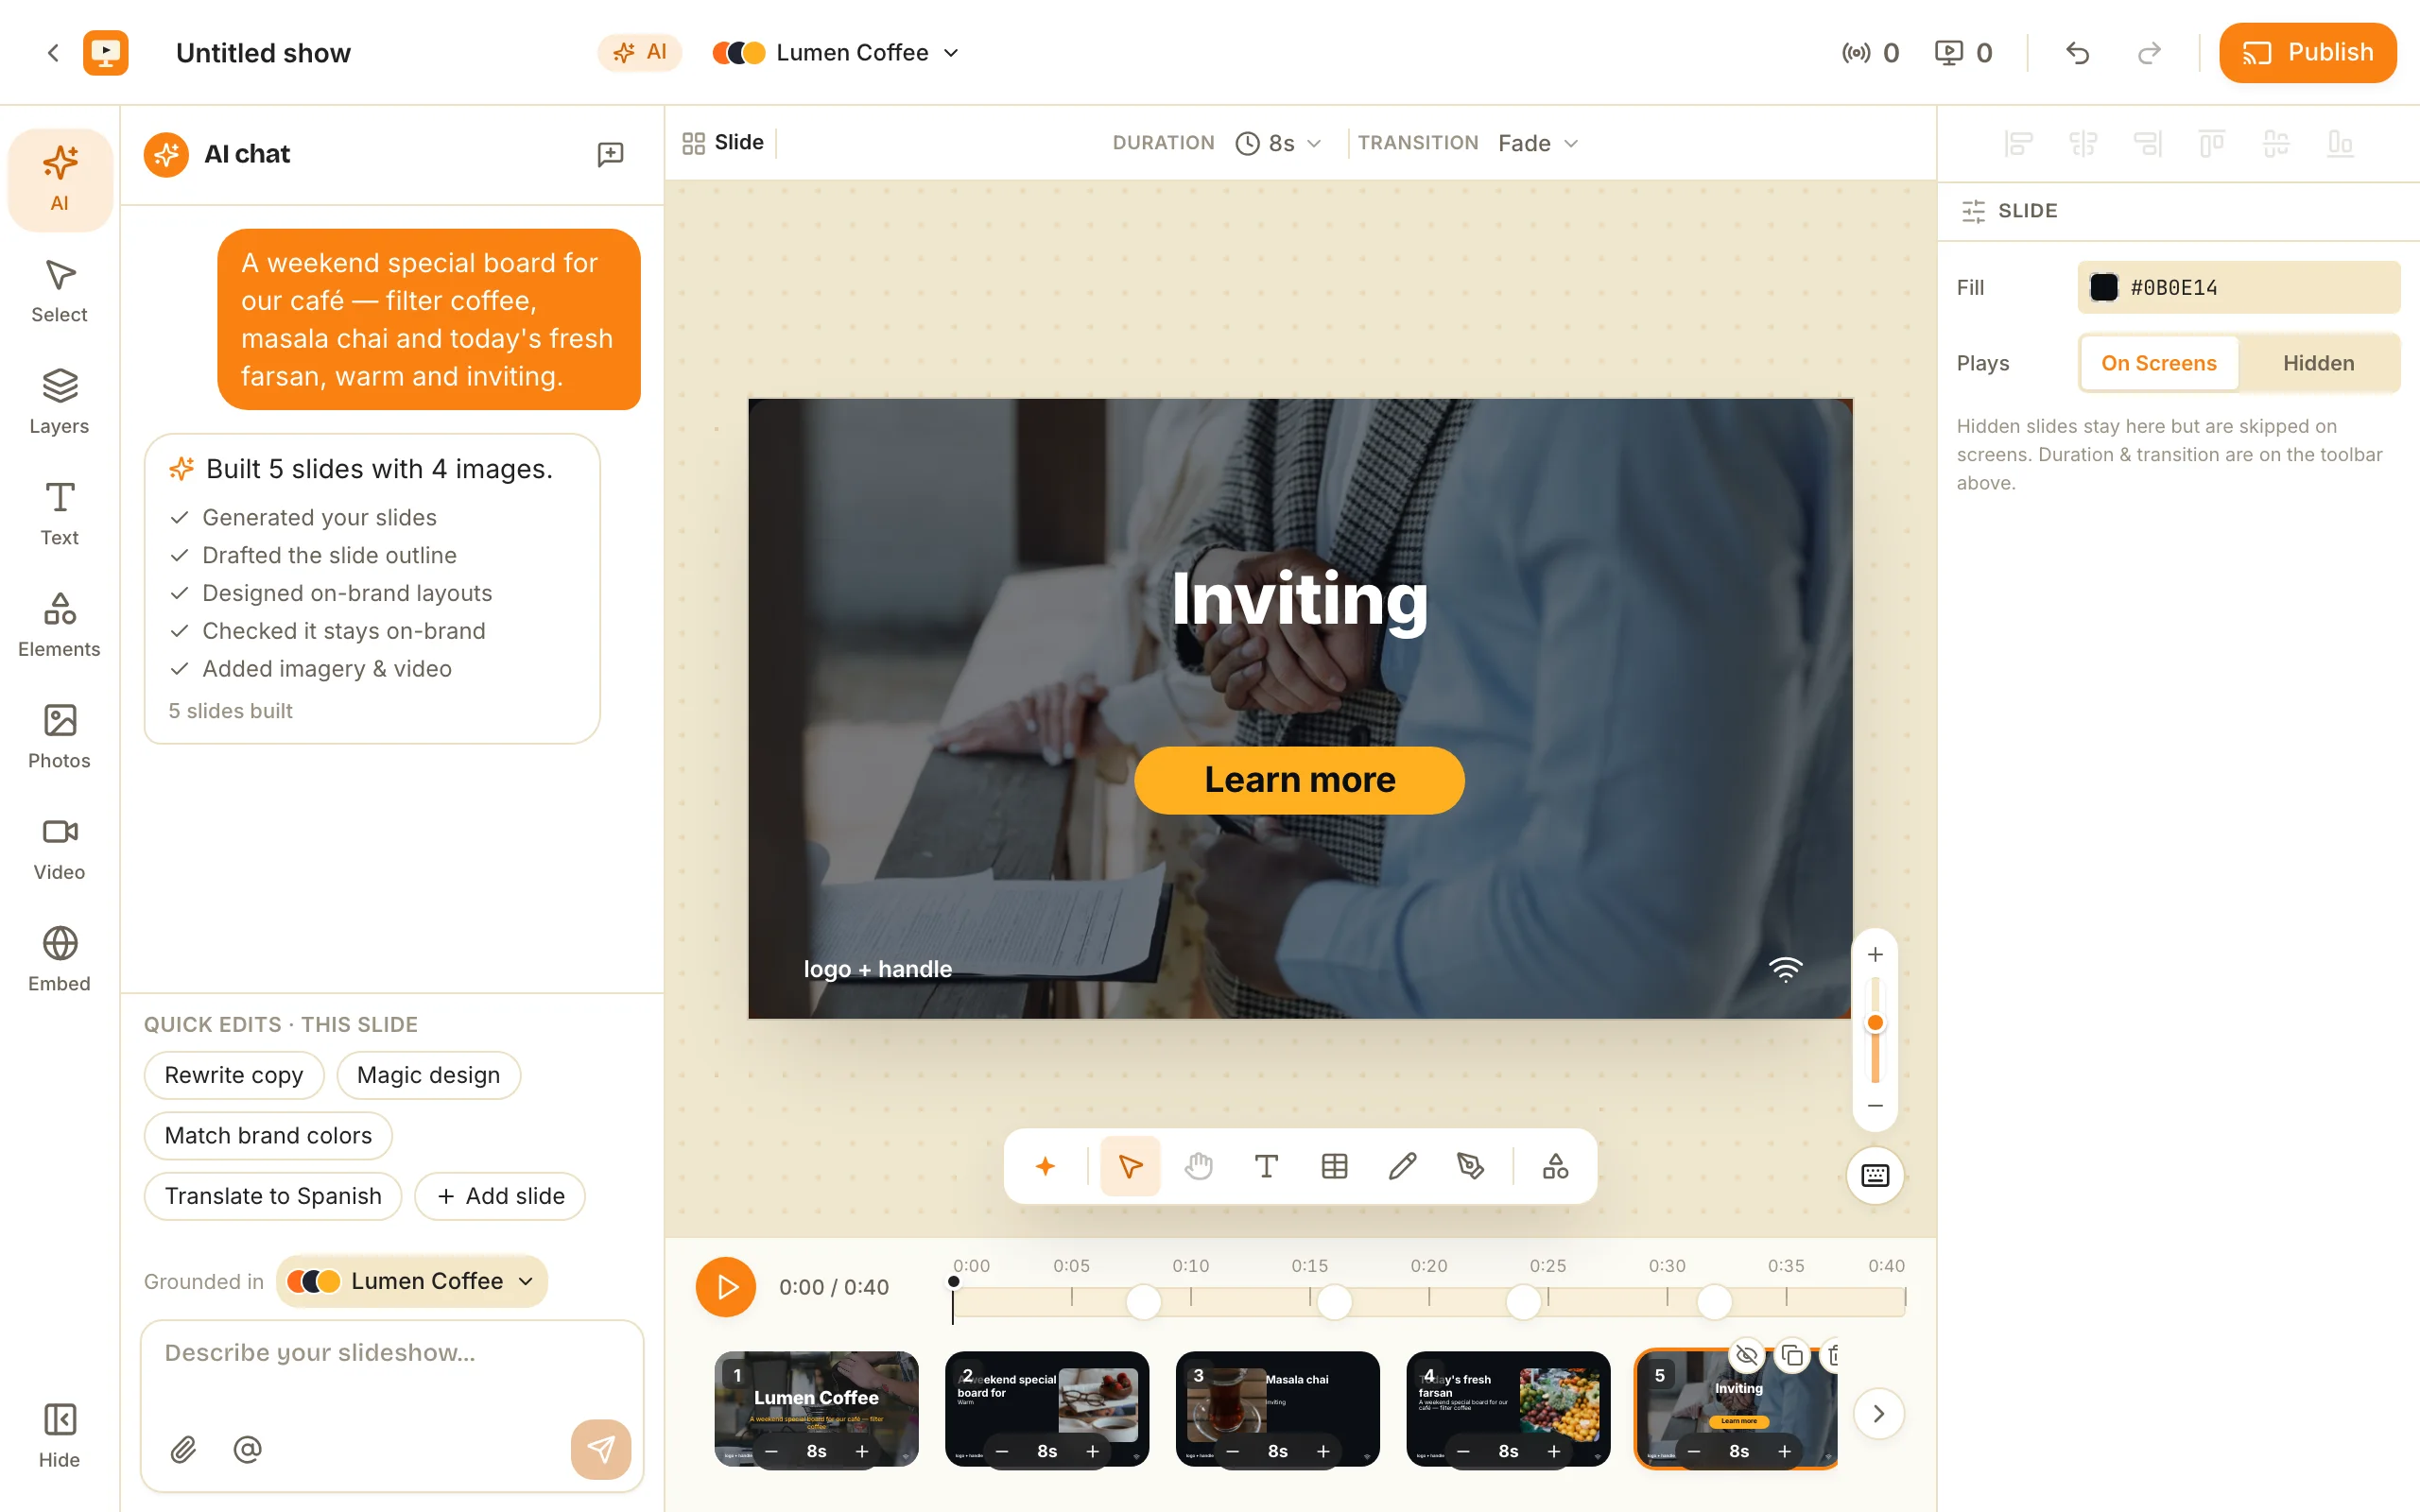
Create a new show and hand ChannelOS the source: upload the PDF, upload a photo of the printed menu, or paste a webpage URL if your menu lives on your site. The AI reads the text, headings, sections and prices out of it and drafts a complete, on-brand, multi-slide board — starters, mains, drinks — laid out for a screen rather than for A4.
You can also skip the file entirely and describe it. One sentence — “evening menu for a small Italian place, six pastas, four wines, warm and dark” — produces a full draft you then correct.
The output is a real show, not a flat export. Every heading, item, price and photo is its own selectable element. That distinction is the entire point: it is what makes the next twelve price changes a click instead of a rebuild.
Then you take it the last ten per cent in the editor:
- Swap a stock photo for your own, or pull a plated dish off its background with one-tap background removal so it sits on your colour.
- Put allergen and set-menu detail in a table — columns read as columns and badly as a text box.
- Add a live clock, a weather widget for the terrace board, a QR widget pointing at your order page, or a ticker line along the bottom for “kitchen closes 10:30”.
- Group a dish photo with its caption once, and they move together after that.
If you would rather start from a finished layout than a described one, the templates gallery has menu boards you can remix — same editable result, different starting point.
Why it matters: your menu is already written. The work is not authoring it again, it is putting it on a screen.
Route 3: build the menu board from scratch in the editor
Take this route when you know exactly what you want and the AI draft keeps not being it — a board with an unusual structure, a brand with strict rules, a layout you have already designed on paper.
Start a new show, set the aspect, and build. The editor is Canva-style: drag text and image layers onto the slide, position and resize them, rotate, snap, align. Free Pexels photos and videos are built in, so you are not hunting for imagery in another tab. Brand kits keep the fonts and colours consistent if you are building several boards.
Two things make this faster than it sounds. First, keyboard shortcuts do the repetitive work — duplicate a priced row, nudge, align, undo. Second, groups: build one item row properly (name, description, price), group it, then duplicate the group down the list and retype the words. Most menu boards are one row designed once and repeated fifteen times.
Build the drinks board second by duplicating the food board and replacing its contents. The third board takes a fraction of the first.
Why it matters: from scratch is the slow route on purpose. It is worth it exactly when the draft would need more correcting than building.
Put it on the TV: pairing takes about two minutes
Whichever route made the board, this part is identical.
- On the TV, open the player URL in its built-in browser. It mints a screen and displays a pairing code and a QR.
- Scan the code from your phone, or type the code into the operator app.
- The screen is paired and named. It appears on your live board with a real rendered preview of what it is showing.
- Point it at your menu board — either go live now, or put the board on a channel with a time window.
There is nothing to provision, and no licence attached to the device. Add a cheap HDMI stick only if the display is old enough to have no browser at all.
Your first screen is free forever. Additional screens are per screen per month, with the current rate on the pricing page.
How to make a digital menu board that stays correct after day one
This is the part that separates a board people trust from a board people stop reading. Working out how to make a digital menu board is an afternoon; keeping it right is the actual job, and three product behaviours do most of it.
Edit once, airs everywhere. A screen derives what it plays from the show plus the channel schedule, in real time. Change a price in the editor and every screen running that board is correct within seconds. There is no publish step to forget, which matters because a forgotten publish is exactly how one screen ends up three weeks behind the others.
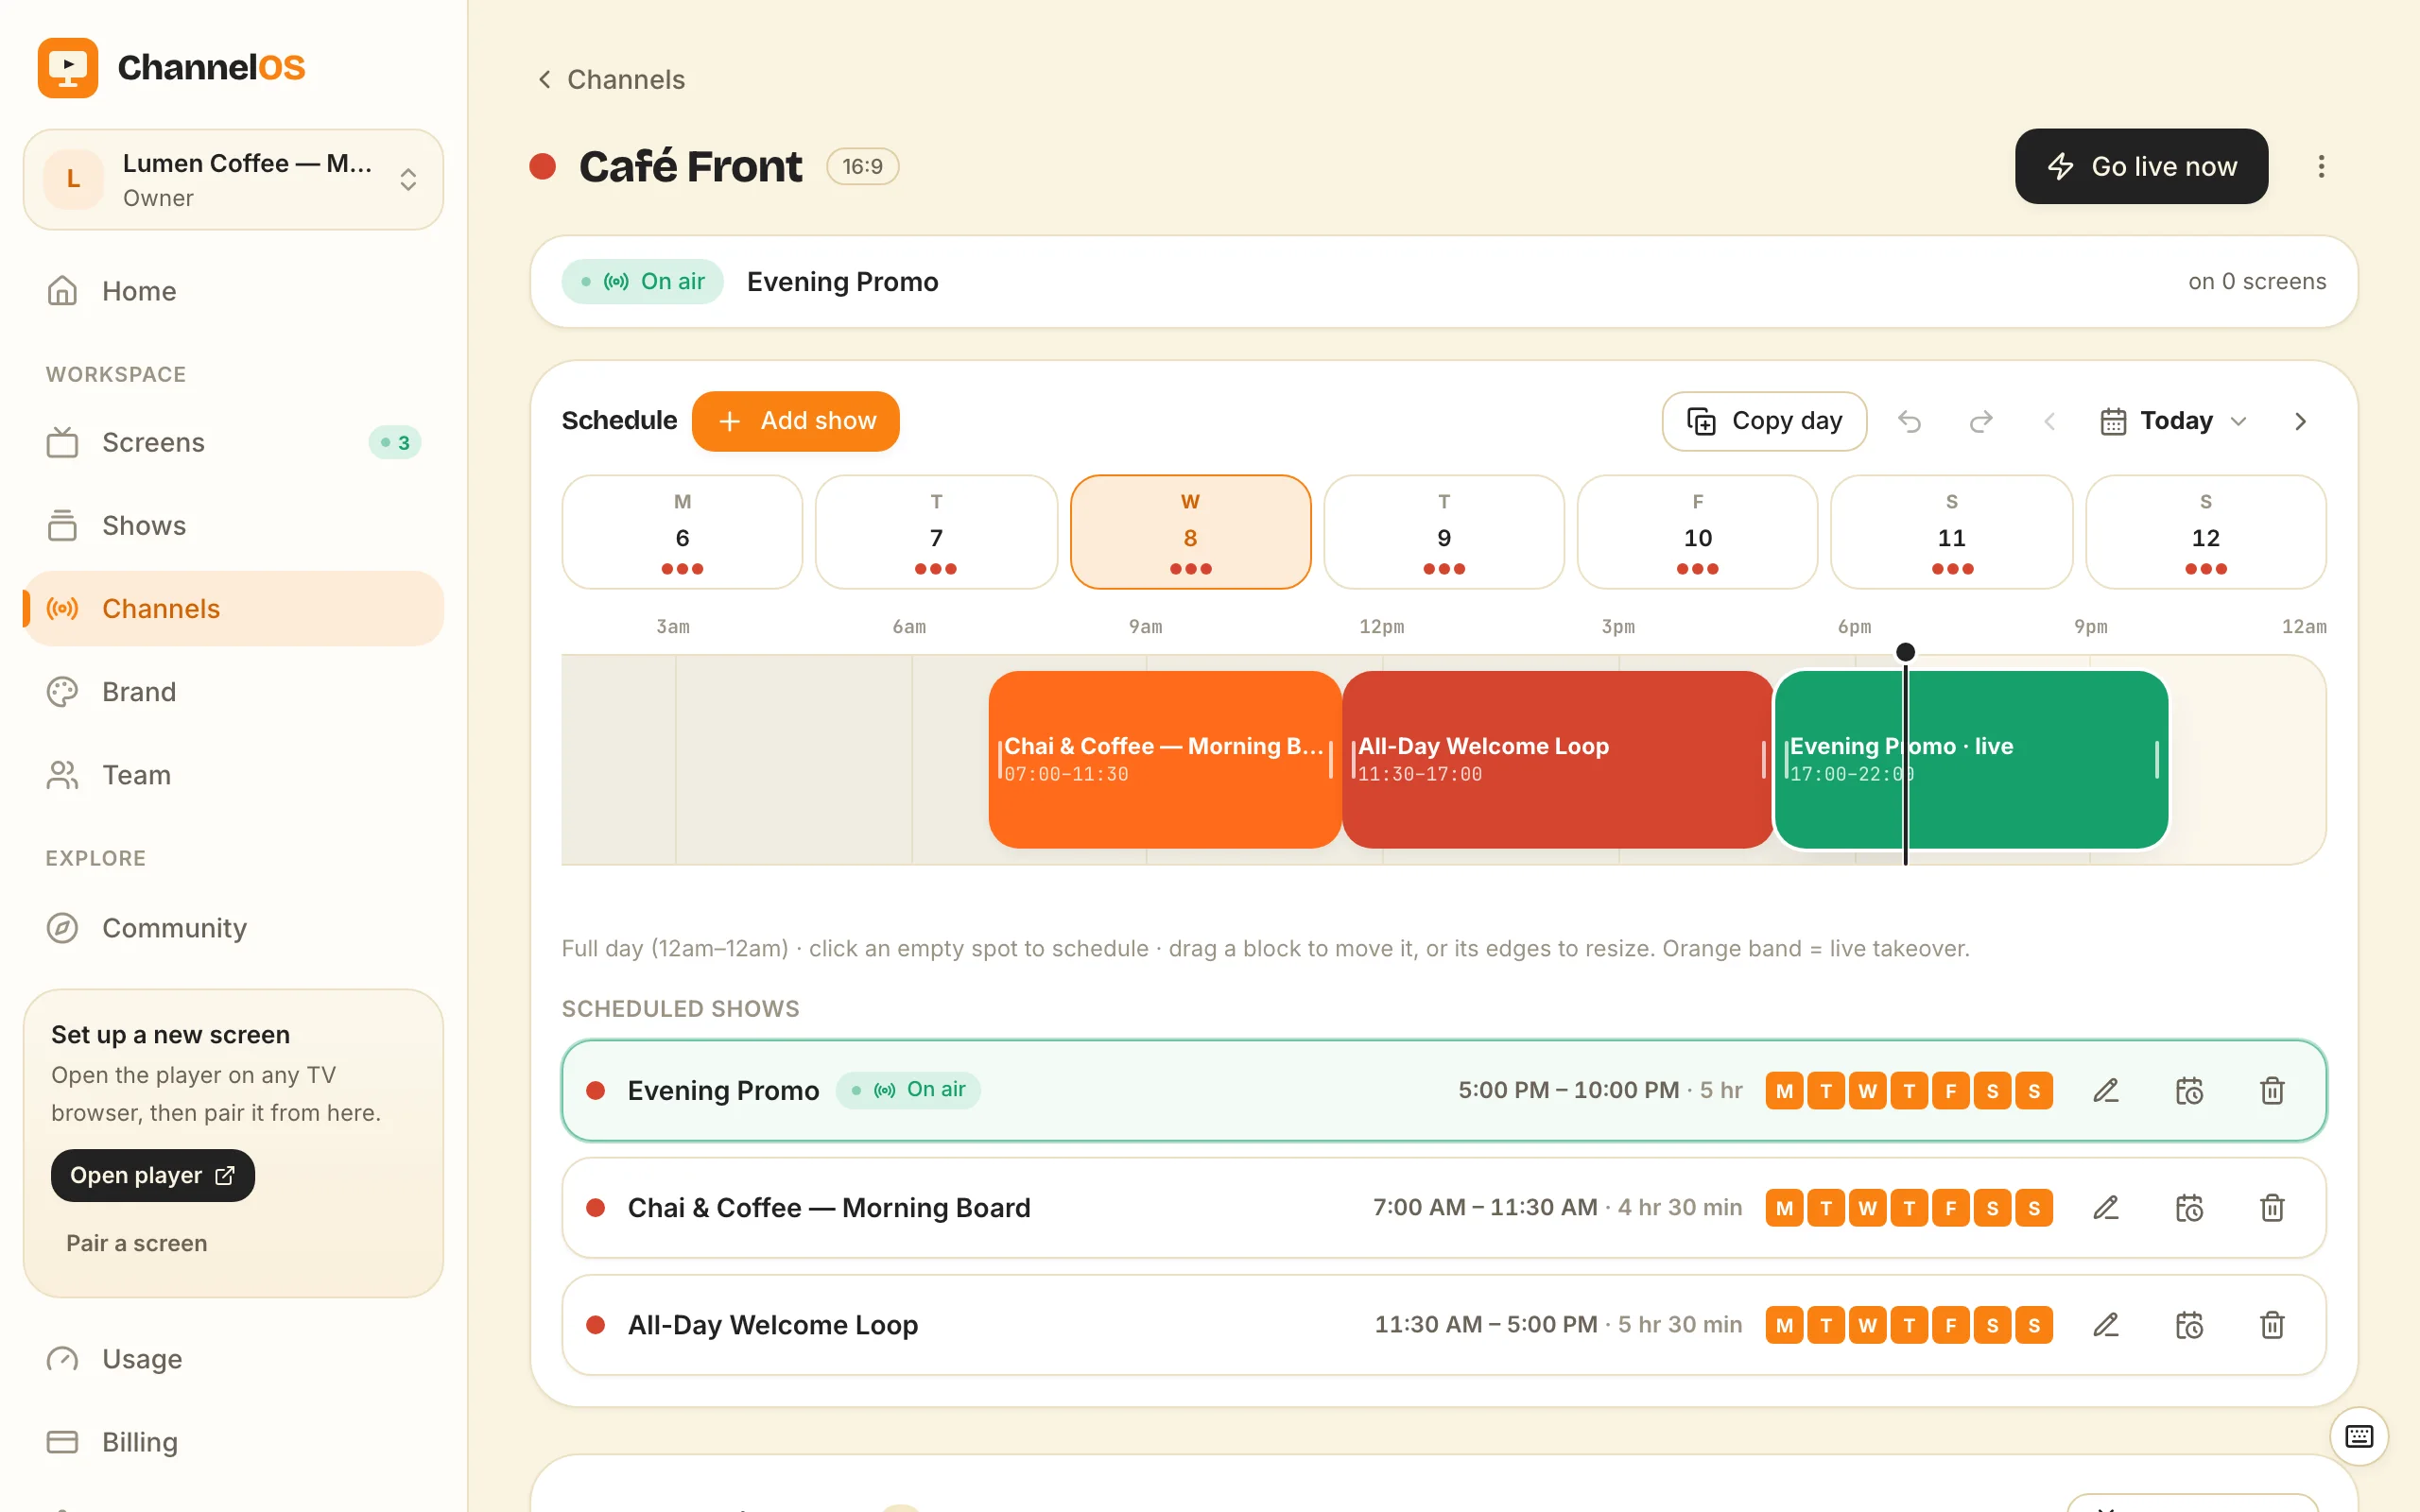
Dayparting. A channel is a named feed with a real daily timeline. Put the breakfast board on until 11am, lunch through the afternoon, dinner at night, and a different board at weekends — set once, and each screen follows its own clock from then on. Nobody has to remember to swap the board at the moment the room is busiest.
Takeover. Something sells out, the card machine dies, the fryer is off. Fire a live takeover and it cuts in on every screen on that channel immediately, then the normal schedule resumes when you drop it. You never edit a permanent board to say a temporary thing.
Why it matters: the failure mode of menu boards is not ugly design. It is a correct-looking board with last month’s prices on it.
Which route should you pick?
| Free maker | AI from PDF or photo | From scratch | |
|---|---|---|---|
| Time to first board | Minutes | Minutes | An hour or more |
| Account needed | No | Yes | Yes |
| Output | 1920×1080 PNG | Editable multi-slide show | Editable multi-slide show |
| Changing a price later | Retype and re-download | Click the price, type | Click the price, type |
| Best for | Trying it, one-off boards | Anyone with an existing menu | Exact layouts, strict brands |
Most people should start at route 1 to see a board of their own on a screen, then rebuild it via route 2 the moment they want it to maintain itself. Route 3 is for the board that has to be a specific way.
If you want the layer underneath all this — what the software has to do and what the full setup actually costs — the digital menu board software guide covers it, and digital menu boards for restaurants works through a full service day.
Get the first one on a screen
Type it into the free maker, or hand the AI the PDF you already print. Pair the TV in about two minutes. Then change a price from your phone and watch the screen follow.
no player box, no per-device licence — and your first screen is free.
Frequently asked questions
- How do I make a digital menu board for free?
- Use the free menu board maker at /tools/menu-board-maker. You type your sections, items and prices, pick one of 14 cuisine styles, and download a 1920×1080 PNG with no sign-up and no account. That file is yours to use anywhere — a USB stick, a slideshow app, or as one slide inside ChannelOS. If you want the board to keep updating itself rather than being a fixed image, build it as a real show instead, where every item and price stays a separate editable element.
- What size should a digital menu board be?
- 1920×1080 pixels, 16:9 landscape, for almost every TV you will hang on a wall. That is the resolution the free maker exports and the aspect the editor works in. If the screen is mounted portrait, build the board portrait rather than rotating a landscape design, because rotated text and photos crop badly. Design at the aspect the screen actually is.
- Can I turn a photo of my paper menu into a digital menu board?
- Yes. Photograph the printed menu, upload the image when you create the show, and the AI reads the text, sections and prices out of it, then drafts a complete multi-slide board around them. PDFs and webpage URLs work the same way. The result is an editable show, not a picture of your menu, so you correct a price by editing that price rather than retaking the photo.
- What do I need to put a digital menu board on a TV?
- A TV with a web browser and a working internet connection. Android TV, Google TV, webOS, Fire TV, a Chromebox or a laptop in kiosk mode all qualify. You open the player URL in that browser, scan the code it shows from your phone, and the screen is paired. There is no media player box behind the TV and no per-device licence.
- How long does it take to make a digital menu board?
- The free maker produces a downloadable board in a few minutes of typing. An AI draft from a PDF or a photo of your existing menu takes about as long as the upload plus a read, and then you are editing rather than designing. Building from scratch in the editor is the slow route and the one worth taking only when you know exactly what you want. Pairing the TV afterwards takes about two minutes on any of them.
- How do I change a price on a digital menu board?
- Open the show, click the price, type the new number. Because a screen derives what it plays from the show and the channel schedule in real time, every screen running that board corrects itself within seconds — there is no separate publish-and-sync step to remember. The same applies when you pull an item that has sold out.
Your screen is two minutes away.
Open the player on a TV, scan the code, publish a show. Your first screen is free.
Free screens show a ChannelOS banner along the bottom of the screen, and any paid plan removes it.